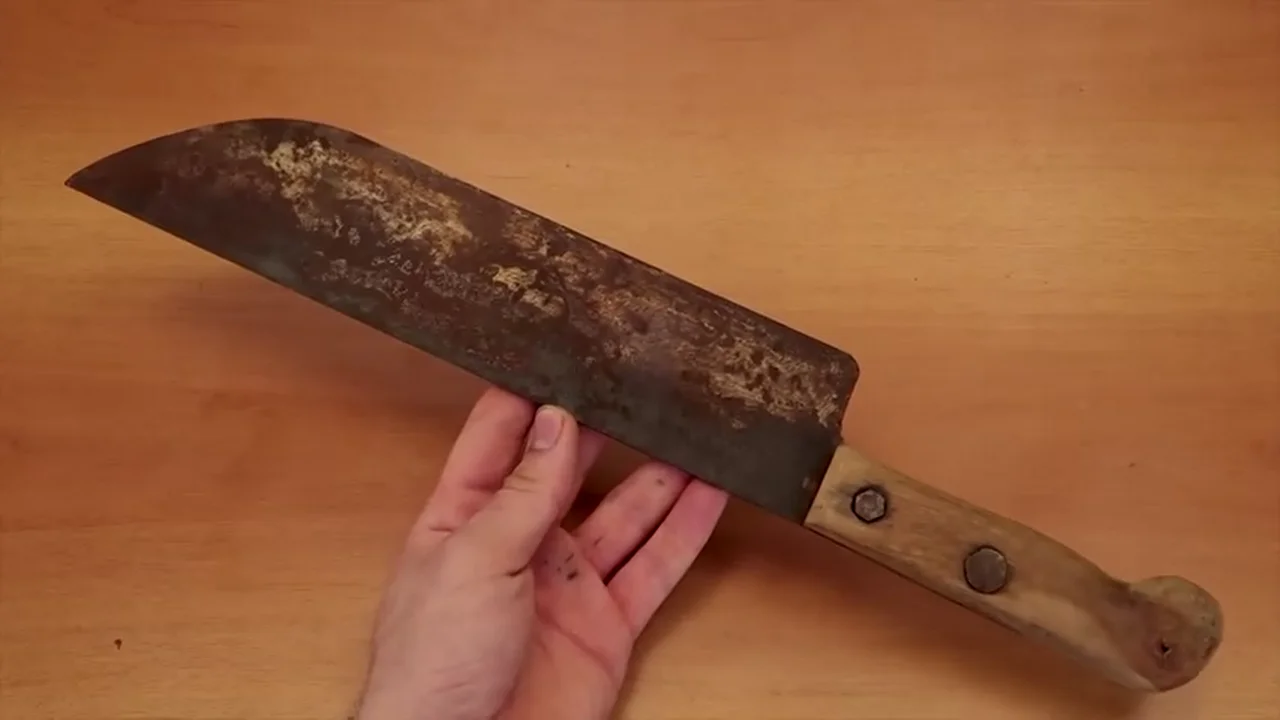
Turn A 2€ Rusty Knife Into High-End Japanese Chef's Knife
I found this big knife at a local flea market in a bucket of "everything 2€" miscellaneous items. I bought it with the intent of lightly restoring it but after a close inspection I thought I was better off doing something more interesting with it since the construction was pretty bad, with un-even grinds, terrible pins and poor materials. After removing the rust I could also tell it has pretty much no historical value since it has no marking at all.
I got this old pitcher pump at an auction. It is in pretty bad shape. The leather seals were missing or just disintegrated. It was rusted and worn out. I brought it back to life. Enjoy the video.
Thank you for watching, I hope you liked the video.
Please like and share this video with friends who also have an interest in restoration.
Lighter restoration of a broken Machine Gun model Browning M2 .50 Caliber. I restore and repair this beauty and I also sandblast and make a custom part on my lathe in this challenging restoration video.
I got this broken lighter from a fan who send it to me to restore. He wrote that he found it among some metal trash – somebody must have stepped on it, cause the machine gun tripod was broken and the gun barrel was bended in a way that was almost impossible to repair.
The lighter was in surprisingly good shape, all the parts were functional. I did have to remove some deep scratches which I guess came from taking the lighter in and out from the machine gun when filling it with butane gas.
The Machine gun needed some serious cleaning and sandblasting to remove all old dirt, rust and previous nickel plating. I have loaded the sandblaster with glass beads this time to remove all the unwanted remains and at the same time keep as many details as possible on the Browning M2 machine gun.
I made a custom part on my lathe to link the machine gun tripod together with the Browning M2 cabinet. The old one was broken and unfortunately, I was not able to repair it. I used 3 brass pins to assemble the tripod.
Please like and comment the video and tell me what you think. That will mean a lot to me!
Thanks for watching my videos. See you next week.
In this video i'm restoring an antique ox-tongue iron.
The ox-tongue iron is named for the particular shape of the insert. It was used in the late 19th century.
I bought this one on eBay for $25. The condition of this item was not too bad in terms of rust. Unfortunately the ox-tongue insert was missing. The handle had play because one nut of the two bolts was missing. During the dissasembling I realized that it had asbestos as termal isolation, I replaced it with parts made out of duroplastic. Duroplastic does not melt, it's heat resistant up to around 300°C. As the holes of the handle were not centered, I decided to drill them up and close them with glued in pins. One of the two bolts of the handle was bent, one nut and washer was missing and the used washer was too big. That's why I decided to make it all new. The door didn't fit at all, so I welded up the holes, and made new ones until the door sit flush with the top of the iron. After that I was able to make the outer contur fit. I choose to turn a few parts black. After the first sandblasting I removed all the scratches and pitting with sanding and then I sandblasted them again to achieve a very nice and even surface finish. The bluing then makes a very nice matte shiny look. I decided to polish the body, but I used bluing on the inside for rust protection.
Overall I really like the look from this iron, how the colors of the wood, the black steel and the polished steel play with eachother.
I hope you like my work and the video.
Zippo lighter restoration from The Vietnam war Ba Ria Post year 1972-1973. Today I restore and repair an awesome lighter from Vietnam with a Red Cross combat MEDIC badge attached to is.
This Zippo lighter is a metal detector ground found from Ba Ria-Vung Tau Province in Vietnam. It has been partially buried in
RESTORATION PROCESS
I always start with WD40 rust remover. Just to loosen things up. The inner case was stuck in the zippo bottom case as usual, so I was forced to use fire and a hammer to loosen those two parts from each other. I washed inner/outer case in soap and alcohol and found some beautiful inscriptions on the lighter.
The inside case was damaged, so I had to repair it with a little heat treatment. I used the home-made mini tumbler (as usual) to clean the small parts. I cleaned the inside lighter case in the sandblaster with low air pressure and I used white virgin aluminium oxide.
I heat treated the inside Zippo case to achieve a beautiful brown Matt army color. I polished the case and lid to mirror blank and added the Red Cross combat medic badge.
In this video I this video I'm restoring a 70 year old Yale lift truck.
I picked this up a while ago when I came across it in a very cool antique store in the UK. As soon as I saw it, I knew it had to restore this beauty. I lugged it into the back of my car and have been storing it ever since. The trucked worked just as it did the day it came out of the factory and I'm not suprised. This thing is built like a tank and made to last. I few nuts were seriously seized, one of them I had to destroy. The other one was the one holding the bearings in the bearing cover for the spinning wheel. I didn't want to destroy the nut so I cleaned it out with contact cleaner, baked it and packed it with new grease. All of this sadly happened off camera as I was using a bad battery without knowing it. I really couldn't find any inforamtion about this particular lift truck. The colour I painted it was matched as best I could to the origional. Spare parts were a not an option with this one. I like to keep things as origonal as possible, all of the origional parts were used besides the spit pins. The stickers were printed by a company and they got the size slightly wrong. It's not a big deal and I have a sticker primer on order to rectify this in the future. I'm really happy with the final results.
Timestamps:
00:00 – Intro
00:15 – Showing the lift truck
00:26 – The dissasembly
05:11 – Knowling all of the pieces
05:30 – Degreasing in the parts washer
05:55 – Paint stripping
06:32 – Removing the rust
08:13 – Paiting all of the parts with etch primer and wet on wet primer
08:36 – Cleaning up all of the casting imperfections
09:40 – Painting the primer, base coat and clear coat
12:50 – Making the new sticker
13:59 – Working on the plaque
14:47 – Zinc electroplating the unpaitned parts
15:22 – Knowling all of the restored parts
16:06 – Reassembly
22:48 – Before and after
23:09 – RNR eBay – Stay tuned
23:19 – Thanks for watching